.png.webp)
Introduction
Welcome to the ultimate guide on crafting stainless steel jewelry. Whether you are a passionate DIY beginner looking to forge durable pieces at home or an aspiring brand founder ready to scale up with factory production, this comprehensive tutorial covers everything from essential heavy-duty tools to advanced manufacturing techniques.
Why Choose Stainless Steel for Jewelry Making?

Let’s be brutally honest: making a jewelry piece out of stainless steel at home is incredibly difficult compared to softer metals. However, for ambitious jewelry makers, its unmatched commercial value makes mastering this raw material absolutely worth the effort. By understanding the right techniques, you can transform this stubborn metal into intricate designs that perfectly reflect your personal style.
| Feature / Metal | Stainless Steel (e.g., 316L) | Sterling Silver (925) | Copper |
| Workability & Hardness | Extremely Hard. Forgiving to wear, but brutal to craft. It will literally dent or break standard jewelry cutters. | Soft & Forgiving. Very easy to bend, stamp, and cut. Ideal for intricate hand-shaping. | Very Soft. Excellent for beginners practicing wire-wrapping, but bends out of shape easily. |
| Durability & Daily Wear | Exceptional. Highly resistant to scratches, dents, and deformation. Maintains its exact shape even with heavy, rugged daily wear. | Moderate. Prone to micro-scratches and dulling over time. Thin rings or bands can easily bend if snagged. | Low. Extremely soft. Scratches very easily and loses its structural integrity with minimal force. |
| Tarnish & Oxidation | Excellent. Waterproof and sweat-proof. Retains its smooth surface and will not rust or fade over time. | Moderate. Reacts with sulfur in the air, turning black or dull grey. Requires frequent polishing. | Poor. Oxidizes rapidly. Reacts with acidic sweat to leave a notorious green stain on the skin. |
| Hypoallergenic Rating | High. Surgical grades release virtually no nickel, making it perfectly safe for highly sensitive skin. | Good. Generally safe, though some people still react to the copper alloyed within it. | Low. Frequently causes contact dermatitis and turns fingers/necks green. |
| Tool Requirements | Heavy-Duty. Memory wire cutters, cobalt drill bits, and a high-heat torch for soldering. | Standard. Basic jewelry pliers, standard drill bits, and regular silver solder work perfectly. | Standard. Basic, inexpensive craft tools are more than enough. |
| Business Profitability | High Margin. Very low raw material cost, but sells at a premium due to its extreme durability. | High Cost. Expensive raw material with fluctuating market prices, eating into profit margins. | Low Margin. Very cheap to buy, but generally sold for less due to its tendency to tarnish. |
There are various types of stainless steel used in the world of jewelry. While 304 is common, 316L Surgical Steel is the superior type of stainless steel because its specific ratio of metals—including added molybdenum—offers maximum resistance to corrosion. Whether you are crafting stainless steel rings, earrings, or a delicate necklace, 316L ensures the highest quality and safety.
Essential Tools and Materials for Hard Metals
Stainless steel is a notoriously hard alloy containing iron, carbon, chromium, and trace elements like silicon, phosphorus, sulphur, and sometimes selenium to affect machinability. If you attempt to use standard tools intended for sterling silver or copper, you will instantly destroy them. Let’s break down exactly what you need to conquer this stubborn metal successfully.

Choosing the Right Wire Gauges and Sheets
For beginners, gauge selection is the difference between a successful project and severe hand fatigue. Because steel is highly resistant to bending, you must scale down your wire thickness compared to softer metals:
- 24g to 26g: Ideal for intricate wire-wrapping, securing a gemstone, or adding fine details.
- 20g to 22g: The sweet spot. Perfect for making standard earring hooks, delicate jump rings, or stringing beads for a bracelet.
- 18g and thicker: Extremely rigid. Only attempt shaping this thickness with heavy-duty tools, as bending it purely by hand is nearly impossible.
The Ultimate Beginner’s Shopping Checklist
If you are just starting out, do not waste money on generic craft kits. Here is exactly what you need to prepare for crafting stainless steel jewelry:
| Item Category | What You Actually Need | Purpose & Why It Matters |
| Cutting Tool | Memory Wire Cutters | Standard flush wire cutters will dent and ruin their blades on the first cut. Memory cutters are built specifically for hard steel. |
| Pliers | Heavy-Duty Nylon Jaw Pliers | Stainless steel is prone to tool marks. Nylon jaws help you grip and straighten the wire while protecting its smooth surface. |
| Forging | Steel Bench Block & Hammer | A solid steel block and a chasing/nylon hammer are essential for cold forging and flattening your pieces without denting your table. |
| Filing | Diamond Needle Files | You must file down all sharp edges for safety. Standard metal files wear out too quickly; diamond-coated files cut through steel effectively. |
| Raw Material | 316L Stainless Steel Spools/Blanks | Always ensure you are buying 316L (Surgical Grade) to guarantee your piece of jewelry remains hypoallergenic and corrosion-resistant. |
Heavy-Duty Saws, Drills, and Rotary Tools
To move beyond basic wire-wrapping and achieve a truly professional finish, you must upgrade your mechanical arsenal. Here is the strict tool compatibility matrix you need to follow to avoid ruining your equipment:
| Tool Category | Standard Tools (For Soft Metals) | Heavy-Duty Tools (For Stainless Steel) |
| Precision Cutting | ❌ Standard jeweler saw blades (will snap easily) | ✅ High-quality Jeweler’s saw with 3/0 Swiss-made blades + beeswax |
| Drilling Holes | ❌ Standard steel bits (will dull instantly and overheat) | ✅ Cobalt or tungsten carbide drill bits + cutting lubricant |
| Heavy Bending | ❌ Flimsy craft pliers (jaws will bend out of alignment) | ✅ Heavy-duty, parallel-action pliers for maximum grip strength |
Pro Tip: A Dremel or similar rotary tool is not just a luxury—it is mandatory. You will desperately need it for drilling precise holes, sanding down stubborn burrs, and using buffing wheels with polishing compounds to achieve that flawless mirror shine.
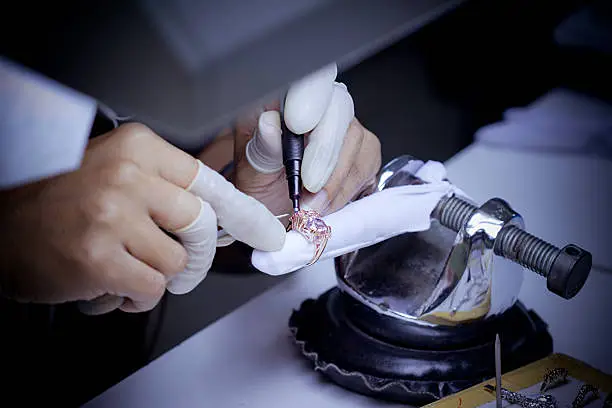
Step-by-Step DIY Process: Making Stainless Steel Jewelry at Home
To create a stunning piece of jewelry out of hard metals, you cannot just wing it. You must respect the correct sequence of operations. A mistake on silver can be easily bent back; a mistake on steel often means starting over.

Step 1: Design, Sketching, and Exact Sizing
Because the metal is incredibly unforgiving, never eyeball your measurements.
- Use a steel ruler and digital calipers to map out your fine details and similar designs on paper first.
- Pro Tip: Standard pencils rub off steel immediately. Use a carbide-tipped scribe or a permanent marker to draw your cut lines directly onto the metal. Precision at this stage saves hours of frustration later.
Step 2: Cutting and Annealing (The Secret to Softening Steel)
When cutting steel sheets or thick wires with a jeweler’s saw, you must use a cutting lubricant (like Burr Life or beeswax) on your blades, and cut slowly to avoid snapping them.
If the metal is too stiff to bend into your desired shape, you must use a technique called annealing:
- Dim the lights in your workspace so you can see the metal’s color change.
- Heat the steel evenly with a high-heat torch until it reaches a dull, cherry-red color.
- Immediately quench it in a bowl of water. This process temporarily alters the crystalline structure of the metal, softening it just enough to make bending manageable.
Step 3: Cold Forging and Shaping
Place your annealed steel on a solid steel bench block.
- To shape the metal without leaving marks, use a nylon or rawhide mallet.
- To add texture, use a steel chasing hammer. Striking the surface not only adds a beautiful, rustic character but also cleverly hardens the metal again (work-hardening) and hides minor surface imperfections or plier marks.
Step 4: Assembly – Cold Connections vs. High-Heat Soldering
This is the ultimate bottleneck where most beginners fail. You have two distinct paths:
The Beginner Route (Cold Connections): Skip the heat entirely. Use heavy-duty stainless steel jump rings (you will need two pairs of strong pliers to twist them open), heavy clasps, or intricate wire-wrapping techniques to assemble your pieces. You can securely set a gemstone, trap glass beads, or even pour two-part resin into steel bezels without ever touching a torch.
The Advanced Route (High-Heat Soldering & Welding): Standard electronic soldering irons and soft lead solder will simply roll off stainless steel because of its tough chromium oxide layer. To achieve strong, quality results, you must:
- Sand the joint perfectly flat and clean it with alcohol.
- Apply a specialized high-heat Black Flux (fluoride-based) to break down the oxides.
- Use a high-heat butane or propane torch. Heat the steel itself, not just the hard silver solder, until the solder flows into the joint. Note: For flawless, invisible joints in factories or high-end studios, pulse-arc welding (using machines like an Orion welder) is the industry standard, though it requires expensive equipment.
Step 5: Filing and Mirror Polishing
Steel burrs are dangerous. You must use diamond needle files to meticulously grind down any sharp edges before wearing.
To achieve a brilliantly smooth surface, follow a strict sanding progression: start with 400-grit sandpaper, move to 800, then 1200, and finally 2000-grit. Once smooth, finish with a Dremel rotary tool fitted with a felt polishing wheel and a heavy-cutting polishing compound (like Dialux Green).
- Warning: Polishing steel generates extreme friction heat. Hold your piece with leather finger guards so you don’t burn yourself!
- Bonus Finish: For added flair without carving, chemical etching (using Ferric Chloride and a vinyl stencil) can be used to permanently etch logos or patterns directly into the steel surface.
Scaling Up: The Factory Manufacturing Process
When your DIY brand takes off and your handmade designs are being sold rapidly, making them one by one at your bench isn’t scalable. To grow, you will need to partner with reliable stainless steel jewelry suppliers. Factories do not use hand saws and Dremels; they rely on heavy industrial machinery. Here are the three distinct technologies they use to mass-produce your pieces:
1. CNC Laser Cutting (Best for 2D Flat Designs)
If your brand focuses on custom name necklaces, flat geometric pendants, or precise engravings, factories utilize CNC (Computer Numerical Control) lasers. These machines slice through steel sheets with flawless, microscopic accuracy. This method is incredibly fast, allowing for the rapid production of numerous designs of the final products without the need for expensive tooling.
2. Lost-Wax Casting (Best for 3D & Complex Designs)
For bulky, three-dimensional pieces like signet rings or detailed charms, lasers cannot do the job. Instead, factories use wax molds via lost-wax casting. While this is one of the oldest methods in jewelry history, it has been heavily adapted for steel. Because stainless steel has an exceptionally high melting point (around 2500°F – 2800°F), specialized centrifugal casting machines are required to force the molten liquid steel into the delicate plaster molds before it cools.
3. PVD Vacuum Coating (The Secret to Gold Steel)
Ever wonder how raw silver-colored steel gets a luxurious gold or rose-gold color without losing its longevity? Traditional electroplating wears off quickly. Modern factories use PVD (Physical Vapor Deposition) coating. In a high-tech vacuum chamber, materials like titanium nitride are vaporized and bonded to the steel at a molecular level. This industrial process ensures the gold tone won’t chip, tarnish, or fade, providing extreme durability. To understand exactly how this technology achieves years of wear without fading, explore our complete guide on what is PVD jewelry.
Managing Your Factory Production
Transitioning from a solo maker to a brand director means shifting from working with metal to working with people. Once you establish a relationship with a manufacturer, the process becomes streamlined. You send them your CAD files or physical samples, they create the molds, and they will typically update your mass-production order status via email, taking your brand from a small dusty workbench to a global market.
If you are ready to transition from DIY to a globally recognized brand, Azone Jewelry is your ultimate OEM/ODM stainless steel jewelry manufacturer. Established in 2003, our 1,500-square-meter facility features state-of-the-art CNC, casting, and PVD workshops capable of producing 500,000 pieces monthly. We empower growing brands with flexible low MOQs (50-100 pieces), rapid 7-to-14-day sampling for custom 3D/CAD designs, and strict IP protection. Backed by SMETA and BSCI certifications, rigorous REACH testing, and a 1-to-2-year plating warranty, our veteran craftsmen ensure uncompromising, eco-friendly quality for every order.
Crucial Safety Warnings and Common Beginner Mistakes
Working with heavy-duty metals requires strict protocols. Whether you are cutting, polishing, or welding, safety and precision are non-negotiable.
Essential Safety Gear: Non-Negotiable Protection
Never start a stainless steel project without the following protective gear:
- Eye Protection (Safety Goggles): Snapping or cutting hard steel wires often produces high-velocity metal shards that can easily fly across the room and cause severe eye injury.
- Respiratory Protection (N95 or Respirator): Grinding, filing, or high-heat soldering releases microscopic steel dust and potentially harmful fumes into the air. A high-quality mask is mandatory.
- Hand Protection (Leather Finger Guards): Steel heats up incredibly fast when subjected to the friction of a rotary tool or drill. Without leather guards, you risk severe burns to your fingertips.
Troubleshooting: Why Your Solder Joints Keep Failing
If your soldered joints snap apart with minimal force, you are likely making one of these three classic beginner mistakes:
- Mistake 1: A Dirty Surface Area. Stainless steel forms a tough oxide layer instantly. If you do not file the joint completely bare and wipe away the oils right before soldering, the metal will reject the solder.
- Mistake 2: Using the Wrong Flux. Standard jewelry flux burns away too quickly at the high temperatures required for steel. You must use a specialized fluoride-based black flux to break through the chromium oxide layer.
- Mistake 3: Uneven Heat Distribution. Steel dissipates heat very differently than silver or copper. If your torch focuses only on melting the solder rather than heating the surrounding steel evenly to the correct temperature, the joint will inevitably fail. Patience is the key.
Conclusion
Crafting stainless steel jewelry is undeniably challenging, demanding heavy-duty tools, specialized techniques, and immense patience. However, the reward is a durable, hypoallergenic, and tarnish-resistant piece that lasts a lifetime. Whether you are mastering cold connections at your home workbench or scaling your brand by partnering with professional suppliers for mass production, conquering this resilient alloy is a highly profitable skill. Respect the metal, prioritize your safety gear, and you will successfully turn this stubborn raw material into enduring works of art.
Ready to elevate your jewelry business without the hassle of manufacturing it yourself? Let Azone Jewelry bring your designs to life with precision and speed. Contact Us Today to get a free quote, discuss your 3D/CAD ideas, and start your custom sampling process!
Frequently Asked Questions (FAQs)
Can I use a regular soldering iron for stainless steel?
No. A standard iron cannot reach the temperature required, and soft solder will not bond to the steel’s oxidized surface. You need a torch and silver solder.
Will stainless steel jewelry rust in the shower?
No. High-quality stainless steel jewelry (especially 316L) is highly resistant to water, sweat, and daily wear, making it perfectly safe for the shower.
Is it cheaper to make or buy stainless steel jewelry?
While raw steel wire is cheap, the heavy-duty tools required for DIY are an investment. If you want bulk quantities, buying wholesale from factories is significantly more cost-effective.